
:quality(70))
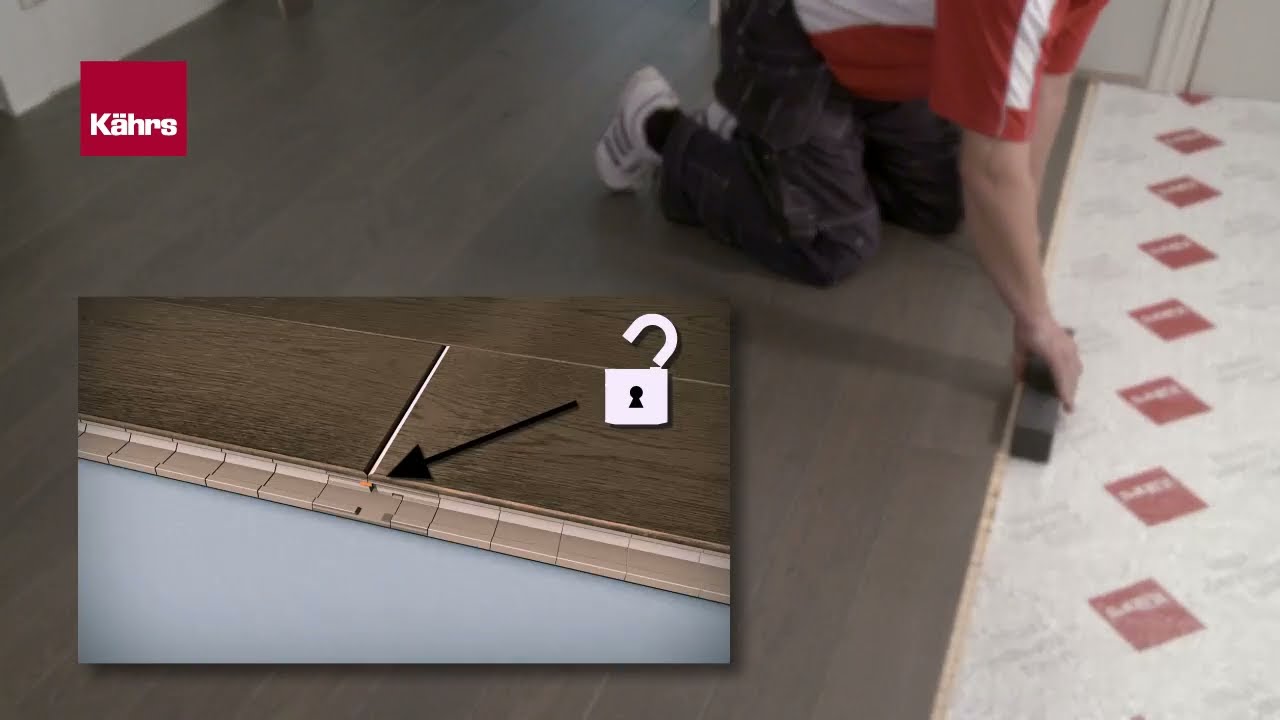
Installing a wood floor from Kährs is efficient and hassle-free, thanks to our precision-engineered Woodloc® locking joint system. This innovative technology seamlessly locks boards together without the need for glue, ensuring a gap-free, stable surface that enhances both durability and performance.
To ensure a smooth installation, we recommend reviewing our detailed installation guide and watching our step-by-step instruction video. Whether you're working on a large-scale commercial project or a boutique space, our system is designed to save time while delivering a flawless result.
Prepare, install, and enjoy a perfectly fitted Kährs floor—built to last.
Before you begin
1
2
Dry & Flat subfloor
A solid start makes all the difference when installing your Kährs wood floor. Start with a dry, level, and clean subfloor to create a foundation that lasts. Remove any old carpeting, debris, or dust for a pristine surface that sets the stage for a flawless installation.
Depending on the subfloor type, a moisture barrier may be needed to protect against excess moisture and ensure long-term performance. Always check moisture levels and follow our installation guidelines for best results.
3
Download guide
Want to learn more about how to prepare your subfloor and work with underfloor heating? Dive into our detailed guide—it’s packed with tips to help you create a foundation that ensures your Kährs wood floor stays beautiful and performs flawlessly.
Take a look at our guide
:quality(70))
:quality(70))
Quick tips
Even seasoned DIY pros can benefit from a few smart tips to ensure your Kährs hardwood floor installs seamlessly:
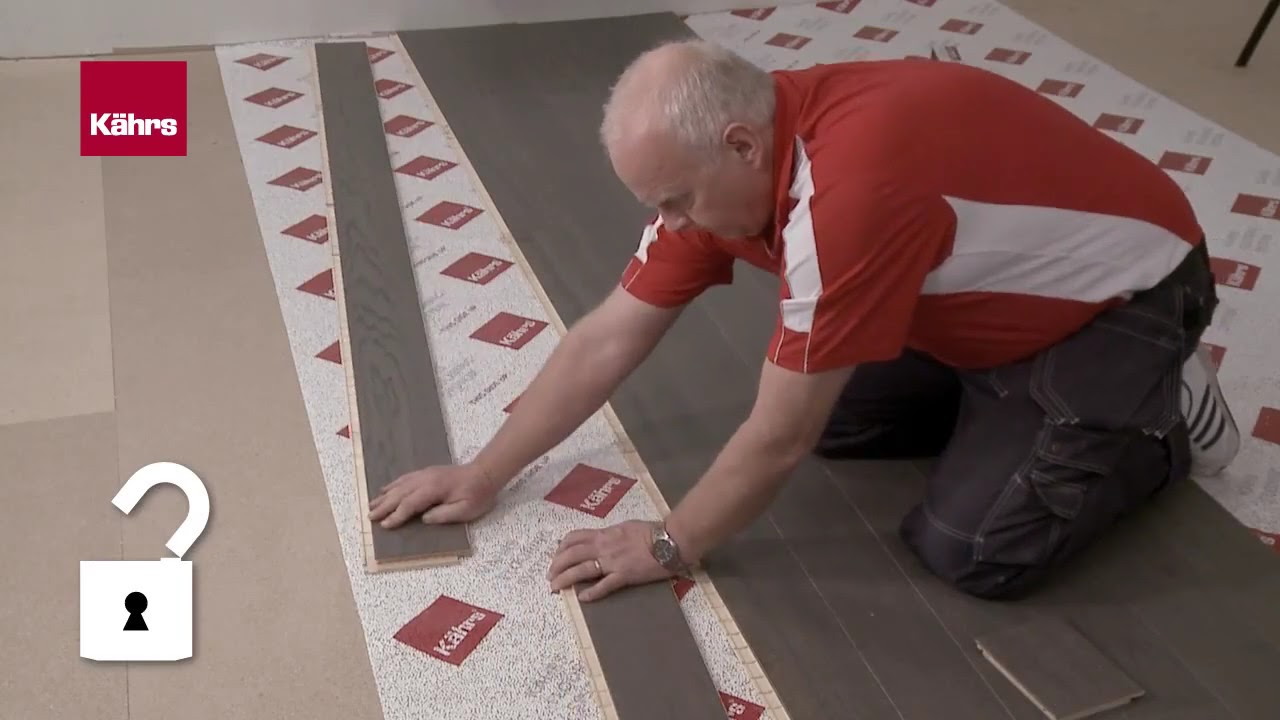
Plan ahead: Measure carefully and calculate the number of boards you’ll need for the room’s width. If your last row would be less than 30 mm, adjust the first row for a perfect fit.
Mix for a natural look: Open several packs and blend boards to create a beautifully balanced color variation. Be sure to check for defects before you start laying the floor.
Lay it right: Position boards lengthways in the room for a more spacious and stylish visual.
Room to breathe: Always leave enough space between the floor and the walls to allow for natural expansion and movement.
Correct orientation: The groove side of each board should face into the room for the perfect fit.
Perfect angle: Install boards at a 20-30° angle to lock them securely in place.
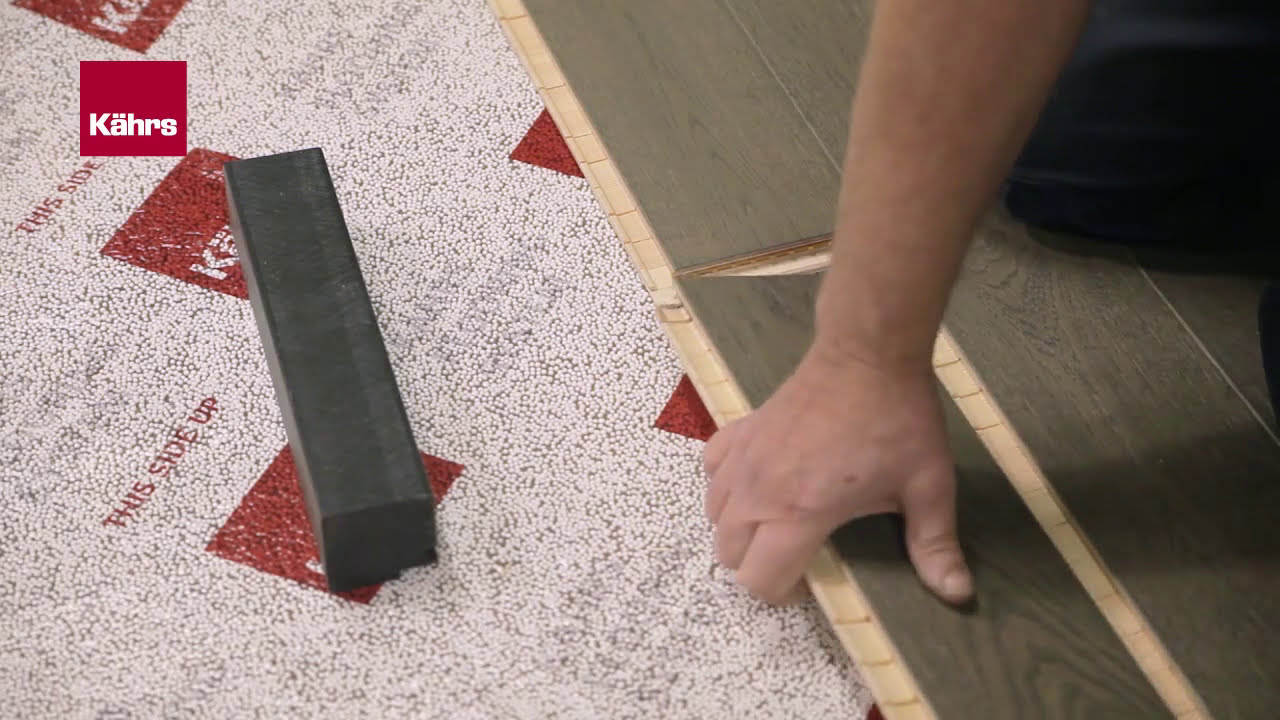
Tight joints: Use a Kährs hand block to lock the short joints snugly.
End joint offset: Keep a 500 mm stagger in end joints between rows for extra stability.
Smart cuts: Start each new row with the leftover piece from the previous row to minimize waste and create a seamless flow.
With these steps, you’ll enjoy a flawless, long-lasting wood floor that’s as beautiful as it is functional.
Instruction films
Normal installation
Locking installation

Last row installation
Quick tips
Read and download our guides